Installing Top Guide Rail for Overhead Sliding Gates: A Step-by-Step Guide
Are you building a gate that should last for decades? Then this guide is for you. The top guide rail is the "backbone" of the system. Rollers can be replaced in 10 minutes, but the rail is installed once and for all. By making the right choice today, you ensure years of flawless gate operation without noise, jerks, or sagging.
Why is this important? The correct geometry of the KSV guide rail guarantees that even a child can open the gate — the panel slides literally from a light touch.
What Types of Top Guide Rails Exist for Overhead Gates?
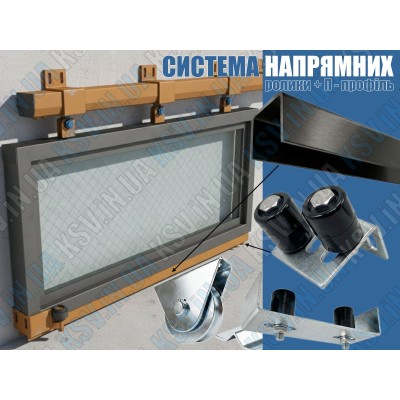
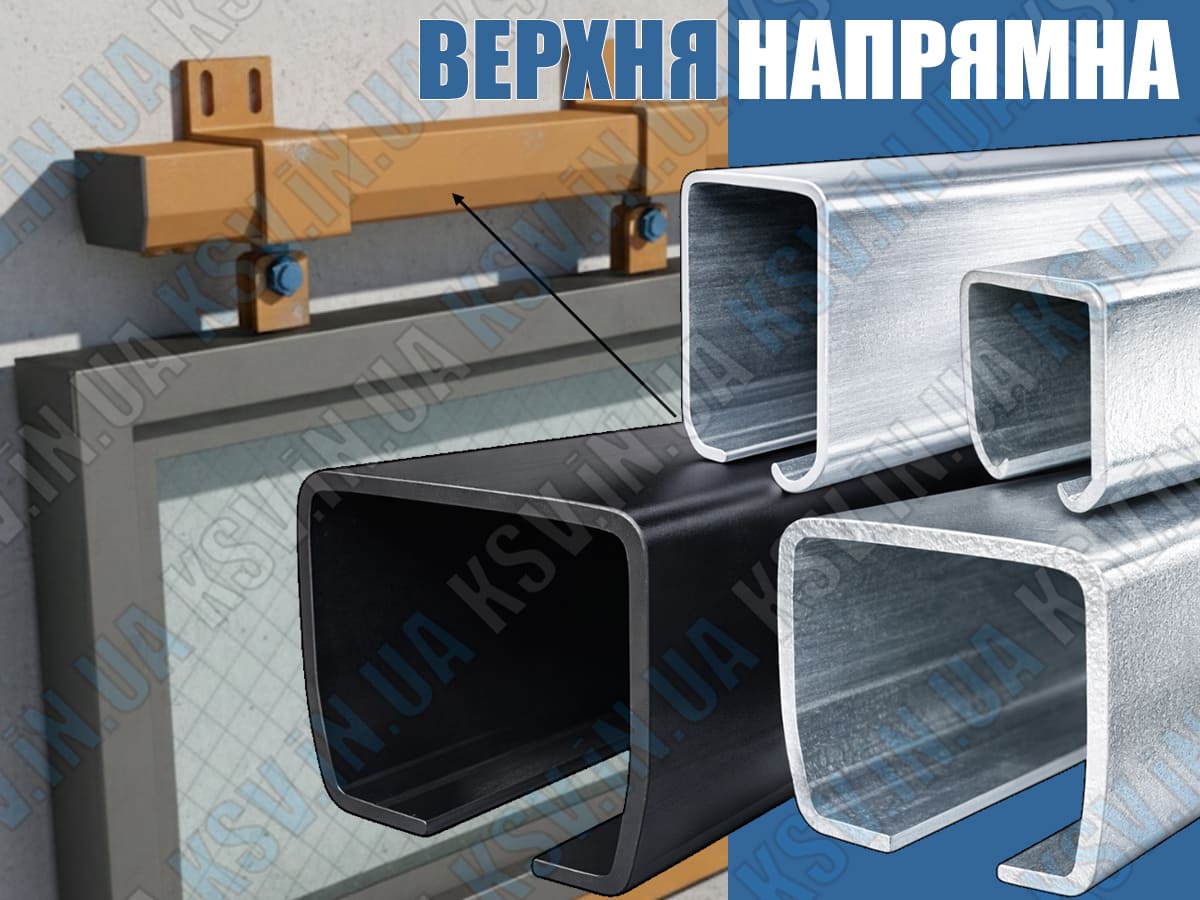
Many people try to use standard cantilever rails or regular tubes, but this is a mistake. Specialized KSW System rails are designed for vertical loads. Our range includes two types of profiles:
Corrosion protection inside and out. Ideal for outdoor conditions. Your guide rail will stay smooth, and the gate movement will remain quiet even after 10 years of operation.
A practical and budget-friendly solution for indoor use (warehouses, workshops). Allows you to paint the rail in the gate's color, providing an aesthetic look with minimal investment.
⚒ Installation Tools List:
- Laser or bubble level
- Tape measure (min 5m)
- Welding machine
- Angle grinder
- Drill or hammer drill
- Wrench set
Step 1: How to Choose the "Golden Mean" for Your Gate Weight
We offer the widest range in Ukraine. You don't need to overpay for extra metal — choose exactly what fits your task:
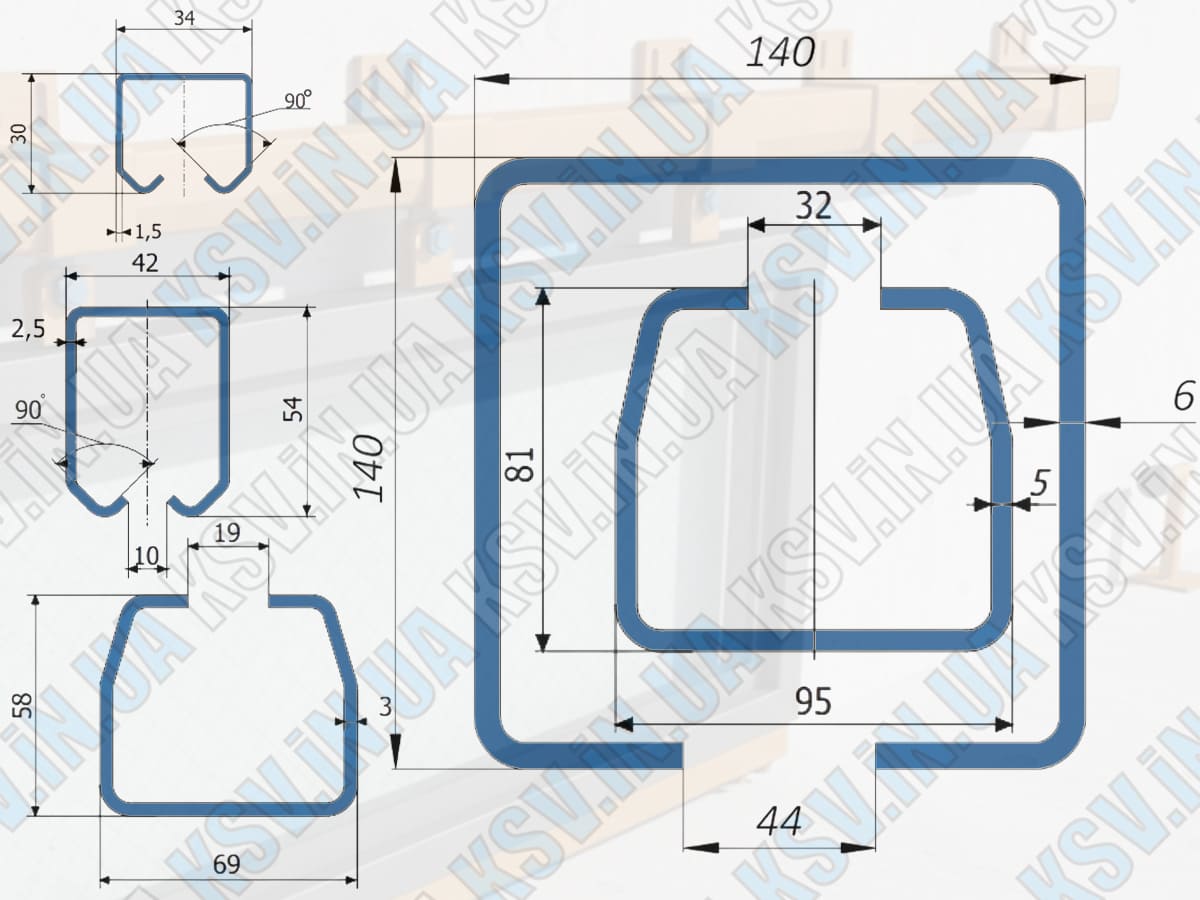
| Size (mm) | Load Capacity | Application |
|---|---|---|
| 34×30 | up to 150 kg | Light doors, barn mechanisms |
| 42×54 | up to 300 kg | Popular choice for private houses |
| 69×58 | up to 500 kg | Medium entrance gates |
| 53×72 | up to 600 kg | Reinforced systems with wide openings |
| 95×81 | up to 1200 kg | Industrial sites, warehouses |
★ Engineering tip: The rail's rated load must be greater than or equal to the gate weight. A 15-20% margin will ensure smooth operation for years.
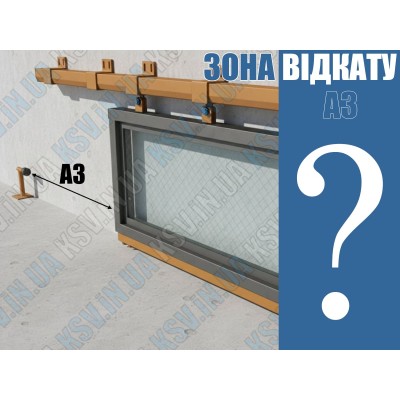
Step 2: Length Calculation and Installation Diagram
To ensure your gate operates with ease, we recommend the Professional Standard: the rail length should be twice the width of the entrance.
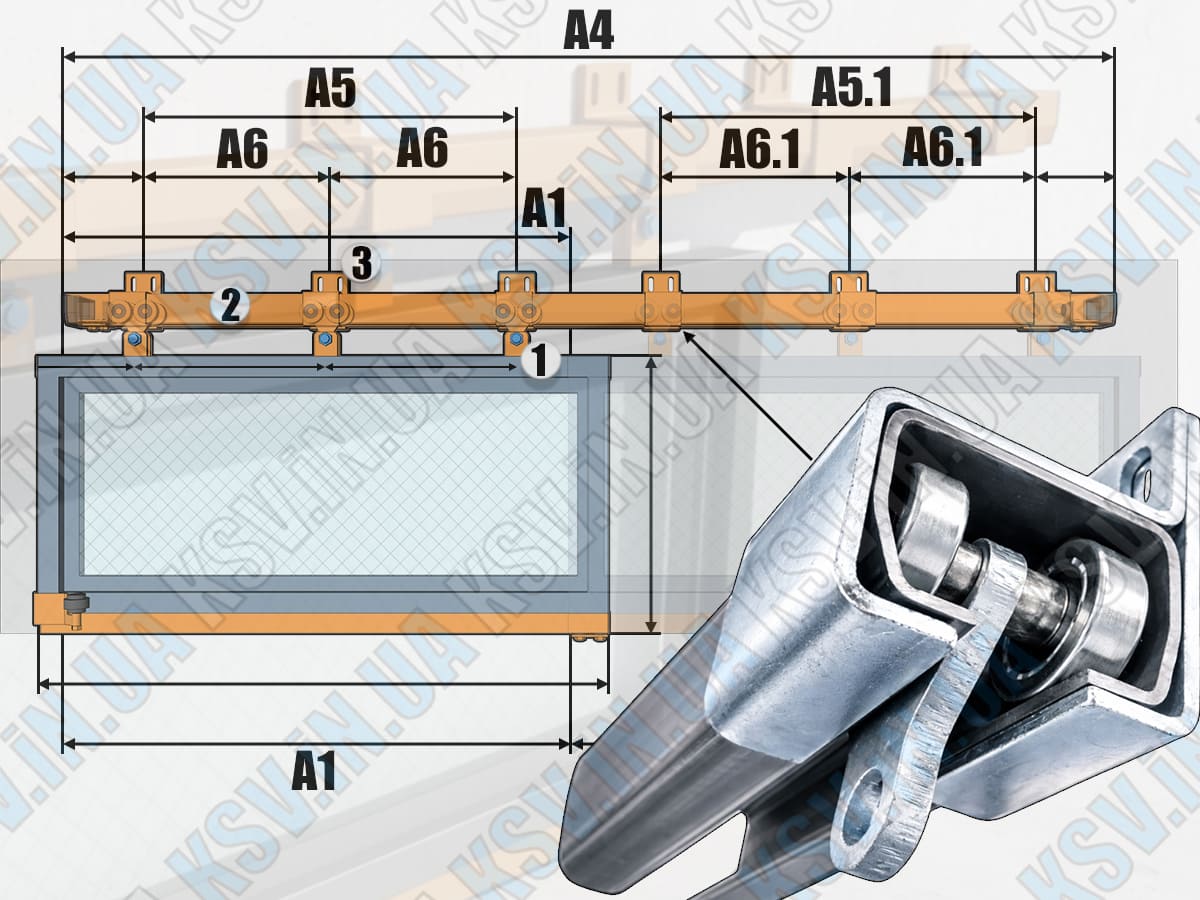
Installation Diagram:
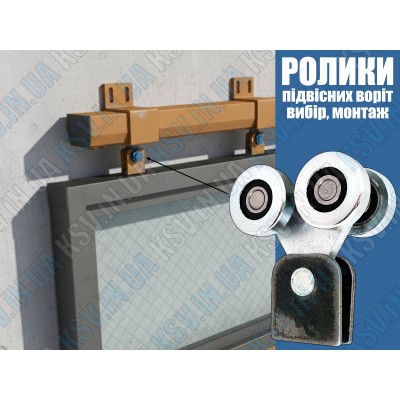
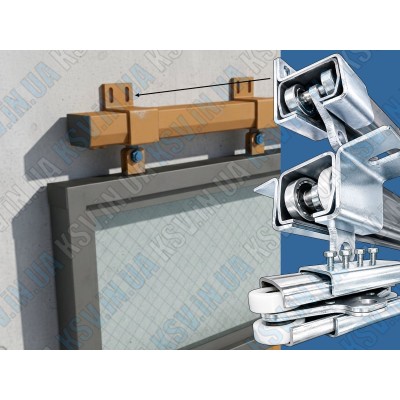
- ● №1 — Roller carriage
- ● №2 — Top guide rail
- ● №3 — Mounting bracket
- ● А1 — Entrance width
- ↔ А4 — Rail length (А1 * 2)
- ↣ А6 — Bracket spacing (50-75 cm)
Rail Length = Entrance Width × 2
Step 3: How to Correcty Install the Top Guide Rail Yourself?
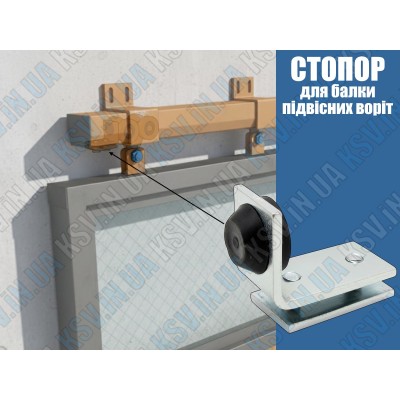
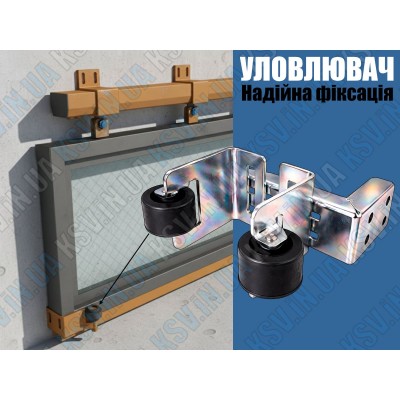
Want to do the installation once and forget about it? Use mounting brackets. This solution from KSV Systems turns the rail into a rigid monolithic structure. Follow these instructions:
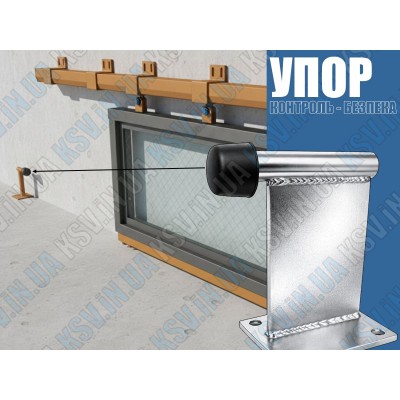
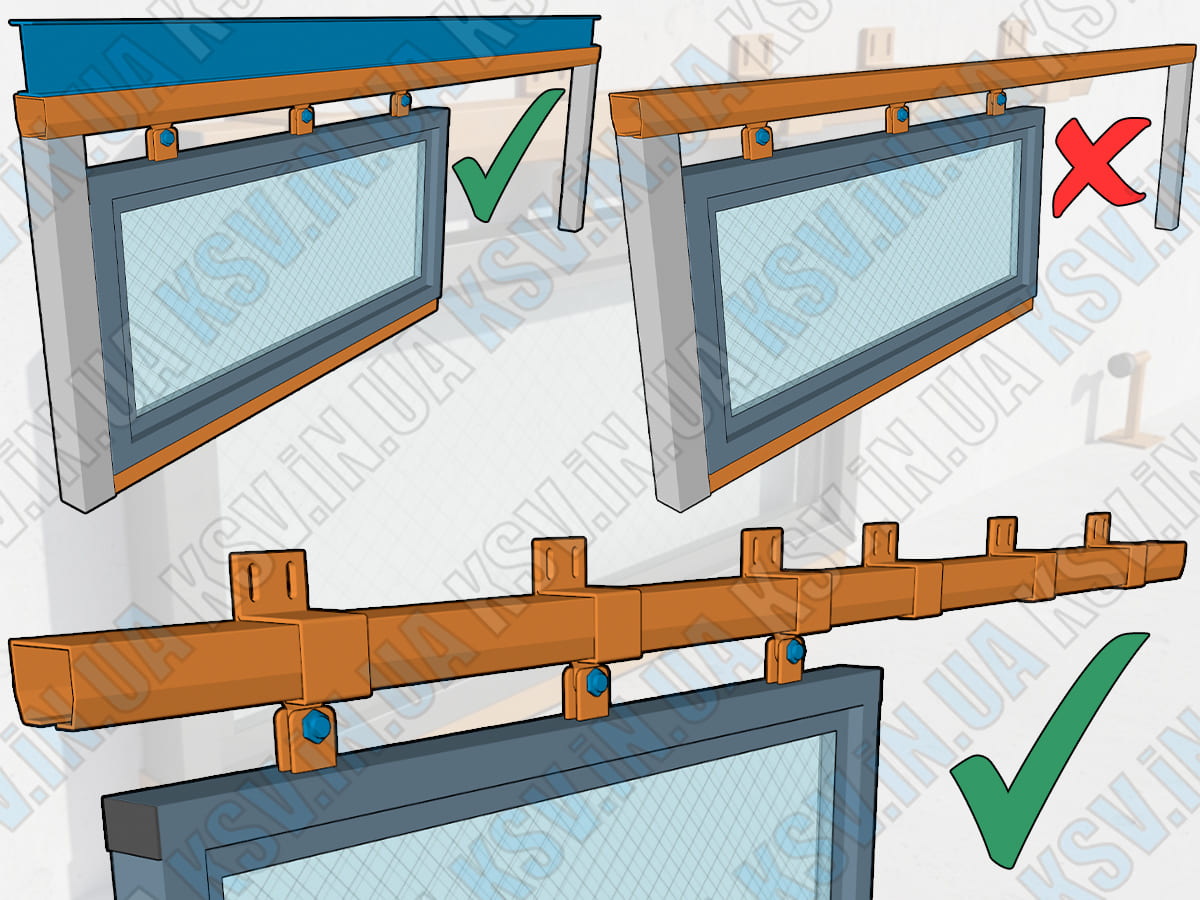
- Horizontal leveling: Use a level. If one end of the rail is even 1 cm higher than the other, the gate will constantly "run away" towards the slope.
- Installing brackets: Secure them with a spacing of 50-75 cm. These provide additional structural rigidity, preventing the bottom flange from spreading.
- Rail preparation: If you have a long entrance and the rail consists of parts, join them strictly inside a bracket for perfect alignment.
- Roller installation: ATTENTION! Insert the roller carriages into the guide rail first, then fix the rail permanently.
Tip: After installation, ensure there are no welding splatters inside the rail. This is the key to quiet gate operation.
Ready for Perfect Results?
Don't waste time guessing — use our professional software:
⚡ We deliver all over Ukraine. We will help with calculations for your requirements!


")
")
")
")
")
")